
What is a 1 x drivetrain and why should you do it?
A 1x drivetrain can be 1x9, 1x10 or 1x11. The number in front of the `x` is the number of your front cogs attached to your cranks, in this case 1 meaning that you only have 1 chainring attached to your cranks. The number after the `x` is the number of cogs on your rear wheel, the latest tech is at 11 cogs, for example 1x10 is a system that consits of one chainring and 10 cogs on your cassette.
1x system is simple, with only one chainring you don't have to worry about chain drop that most of the time happens on the front derailleur. Another thing to not worry about is shifting and chain line, with only a rear derailleur you can use the full range of your gears without having to shift up or down on your front chainring. Doing away with front derailleur is just one less thing to go wrong on your ride.
What you need
- narrow wide chainring
- rear derailleur with a clutch mechanism
In this How To we will be looking at how to convert your bike to to a 1 x drivetrain. This guide can be used on your road bike, cycrocross bike, and mountain bike. I have chosen to convert my 3x9 bike to a 1x10 so I have got myself a few new parts, rear derailler, shifters, cassette and chainring. If you already have a clutch type rear derailler and happy with the number of gears on your rear derailleur then all you need for this conversion is just the single chainring.

Step 1: Remove or dissconnect chain
If your rear derailleur already have a clutch mechanism and you are happy with the amount of cogs on your casette then you DO NOT have to cut your chain, just drop your chain off the chainring and rest it on your bottom bracket. I will be replacing chain and cassette so I will be cutting the chain.

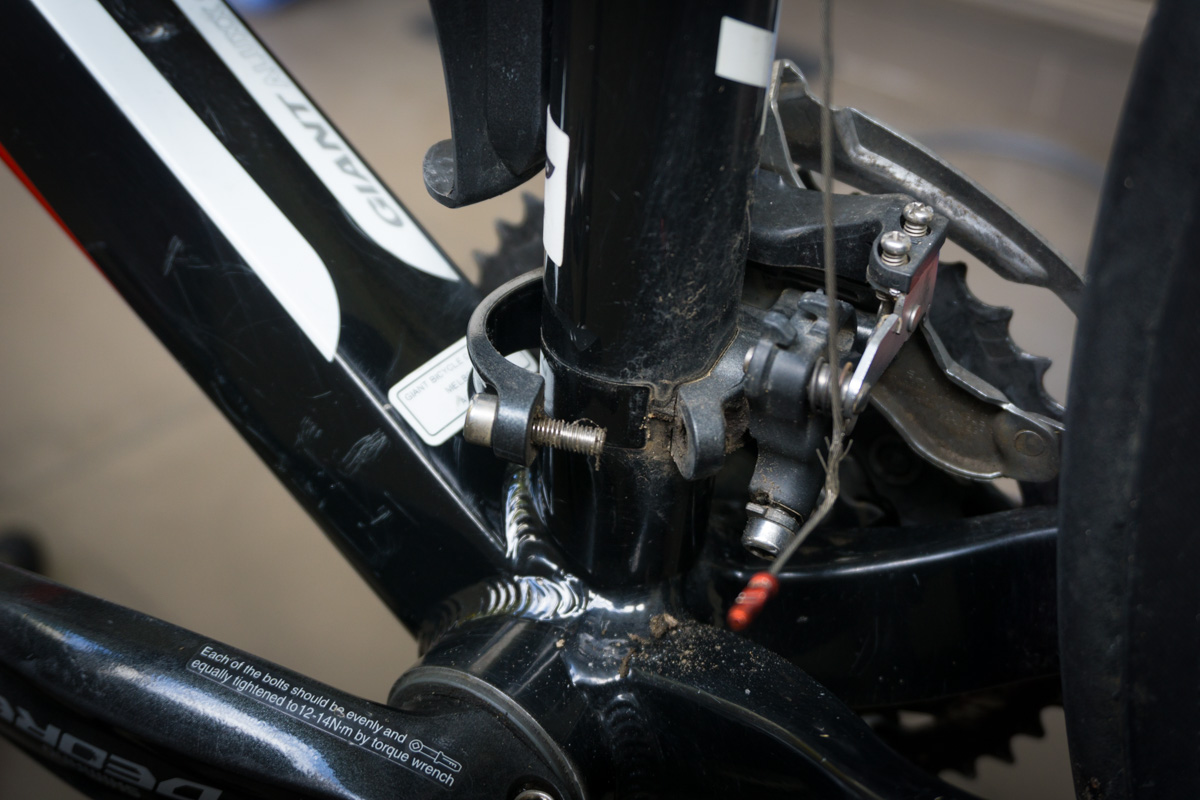
Step 2: Removing the front derailleur
Use a hex key to dissconnect your front derailleur cable from the front derailleur then remove the clamp bolt on your front derailleur. You may need to give it a gentle tap to remove the derailleur from your bike if this is the first time you are trying to remove it.

Step 3: Remove old chainring
Use a hex key to loosen the crank arm bolt on the non drive side and remove your cranks from the bike, more details on removing crank arm here. Once you have remove your cranks, use a hex key to loosen the bolts that holds down your chainring, start with the smallest one first. You will need to remove all the chainrings.


Step 4: Install new chainring
Before Installing your new chainring, it is a good idea to clean your old parts. Start by cleaning your crank arm with some degreaser, spray it all over your crank and use an old toothbrush to work in the degreaser then wash it off with water. You can also give your bottom bracket wipe down and add on some new waterproff grease.

I have chosen the Absulute Black Narrow Wide chainring. This one is an oval chainring, it is suspose to be assisting you in the climbs, I will do a review of this chainring seperately.

If you have a tripple chainring crank you will have to mount your single chainring on the middle position. A new chainring bolt may be needed as your old bolt could be too long, you can use washers if you do not wish to purchase a new set of chainring bolts.

Single chainring bolt are about 5mm thread lenght
It is a good idea to apply some grease to the thread of the chainring bolt and around the area where the chainring make contact with the crank arm, this will prevent creaking noise later on.

Tighting your chainring bolt to the recommended torque setting. Absolute Black recommends 5Nm. Once the chainring is installed on your crank, re-install your crank to your bike, more details on this step can be found in my previous post here.
Step: 5 Remove old cable and shifters
Start from the derailleur, push your shift cable through the cable housing unitl your shift cable exits the cable housing near the shifters. Once the shift cable has been removed the cable housing can easily be removed from your bike. Loosen the bolt that holds your shifter to your handle bars, you may need to remove your handle bar grips and other control instruments before you can remove the shifters

If you are not replacing your rear derailleur you are done here, go out and test ride your bike.
Step 6: Remove rear Derailleur
Disconnect the gear cable from your rear derailleur and then remove the rear derailleur from the rear derailleur hanger. Once the rear derailleur is removed, follow the same instruction on step 5 and remove the shift cable and shifters.

Step 7: Install New Rear Derailleur and Shifter
For this upgrade I have chosen the Shimano XT M786 with shadow+ which is Shimano's clutch technology thing to keep your chain from slapping about when you are riding on the rough stuff.
When installing the rear derailleur make sure that the tab on the rear derailleur makes contact with the rear derailleur hanger before tighting the mounting bolt to Shimano's recommended 8 - 10Nm

Once the rear derailleur has been installed. Start from the handle bar, install the new shifter and tighten the clamp bolt enough just so that the shifter stays in place, we will come back to adjust this to the correct position later.
Feed the shift cable through the cable housing and work your way from front to rear.

Once you have the gear cable hanging by the rear derailleur you can leave it there and continue to the next step
Step 8: Remove old Cassette and Install new one
My bike comes with 9 speed cassette, I have chosen to increase the gears to 10 speed since I have dropped to 1 chainring, this is nessary for hill climbs. I have chosen 11-36T, with 36T chainring and 36T being the biggest on my cassette I am left with a 1:1 drive ratio, this should be enough to get up the hills. You my need a larger cassette if you are planning on going up a really steep hill, maybe 40T at the rear or using a smaller chainring up front.
Remove your old cassette by using a chainwhip and Shimao lock ring remover. If you are standing over the wheel, push your hands away from eachother to loosen the lock ring.

Take care when removing cassette lockring as you will need a lot of force to loosen the lockring. As soon as the ring become loose your hands will continue to move with great force and may hit wheel spokes or cassette.

Pop in the new cassette and the lockring. To install the cassette you do not need a chain-whip. Cassette can be installed by using a spanner and the Shimano lockring tool.
Step 9: Install New Chain
Loop the chain around your chainring and your biggest cog on the cassette, bring the two ends of the chain together to messure your required chain length. Where one end of the chain meets the remainder of the chain I add one extra link to that messurment as I am using a KMC chain link connector. If you are going to use a Shimano chain pin then add two links to your messurment. A more indepth on how to install new chain can be found here on my previous post.
Step 10: Adjust Rear Derailler
Once the cassette have been installed, replace the wheel on the bike then feed the rear derailler gear cable though the rear derailleur. Pull the cable tought by hand and tighten down the cable to the rear derailleur.

Cut the gear cable with a good cable cutter, making sure that it is not too long or over hanging to make contact with the rear wheel spokes or too short that you can't make any adjustements.

I have already written instructions on how to adjust your rear derailleur, you can find my instructions here.
Once you have finished installing and tuning your rear derailleur, move back up to the handlebar of your bike and make sure you have the shifters and brakes at your desired angle. Once angle are set you can then tighten down the clamp bolt.
ALL DONE enjoy riding your new 1 x drivetrain and thanks for reading.

By the way... I have dropped about 800 grams in total bike weight after converting my bike to a 1 x drivetran system.